
Cappuccino is one of the most popular coffee beverages worldwide, known for its smooth balance of espresso, steamed milk, and frothy milk foam. Unlike a latte, which uses more milk, a cappuccino has a thicker layer of foam and less milk, making it a lighter, airier option with a bold espresso flavor.
For those new to making cappuccinos, this guide will walk you through the steps of crafting the perfect cup. From pulling a shot of espresso to frothing the milk and pouring the perfect foam, we’ll cover everything you need to know to brew a café-quality cappuccino at home.
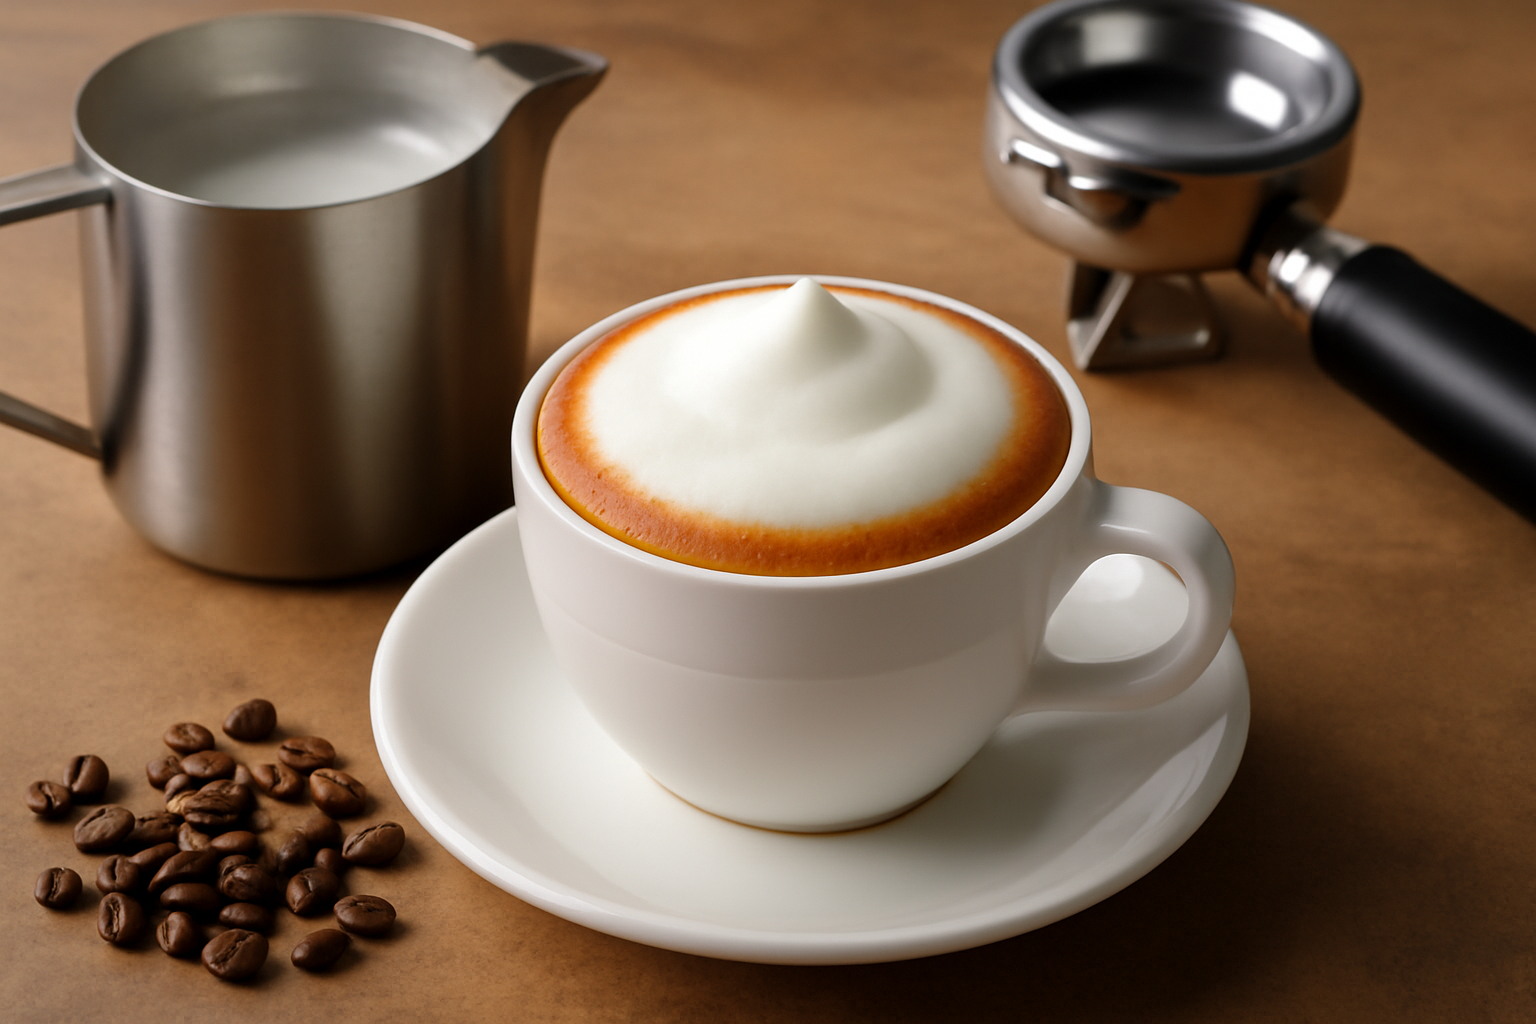
1. Understanding the Components of a Cappuccino
A cappuccino is traditionally made with three equal parts:
- Espresso: The base of the cappuccino, providing the bold, rich coffee flavor.
- Steamed Milk: A small amount of steamed milk provides creaminess and balances the bitterness of the espresso.
- Milk Foam: A thick layer of frothy milk foam sits on top, giving the cappuccino its signature texture and appearance.
The key to a perfect cappuccino lies in balancing these components correctly—too much milk and you’ll have a latte; too little foam, and it won’t be a true cappuccino.
2. What You’ll Need to Make the Perfect Cappuccino
Before you start brewing, make sure you have the following equipment:
- Espresso Machine: You’ll need an espresso machine that includes a steam wand for frothing milk. If you don’t have an espresso machine, you can use a stovetop espresso maker (Moka pot) as a substitute, though the texture won’t be quite the same.
- Fresh Coffee Beans: High-quality espresso beans are essential for a flavorful base. Freshly ground coffee is always best for espresso, so invest in a good grinder.
- Milk: Whole milk is traditionally used for cappuccinos because it froths well and creates a creamy texture. You can use plant-based alternatives like oat milk or almond milk, but results may vary.
- Milk Frothing Pitcher: A stainless steel frothing pitcher is ideal for steaming milk. The spout will help you pour the foam into your cappuccino and create art if desired.
- Tamper: A tamper is used to press the coffee grounds evenly into the espresso portafilter for a consistent shot.
- Coffee Scale (Optional): A scale will help you measure your coffee and water accurately, ensuring consistency each time.
3. Step-by-Step Instructions for Brewing the Perfect Cappuccino
3.1 Step 1: Brew the Espresso
Start by brewing a strong shot of espresso, which will form the base of your cappuccino.
- Grind the Coffee: Use freshly ground espresso beans. Aim for a fine grind, similar to table salt, for the best extraction.
- Tamp the Coffee: Add around 18 grams of ground coffee to the portafilter. Use a tamper to press it down evenly with about 30 pounds of pressure. An even tamp is essential for a smooth extraction.
- Pull the Espresso: Lock the portafilter into the espresso machine and start the shot. A well-pulled espresso shot should take about 25-30 seconds to brew and produce a rich, golden crema on top. If the shot pulls too quickly or too slowly, adjust the grind size and tamping pressure.
3.2 Step 2: Steam the Milk
Now it’s time to froth the milk. The goal is to create velvety microfoam with small, uniform bubbles. Here’s how to steam milk for a cappuccino:
- Fill the Pitcher: Pour about 6 ounces of milk into your frothing pitcher. Don’t overfill the pitcher, as the milk will expand as it froths.
- Position the Steam Wand: Insert the steam wand just below the surface of the milk. Angle it slightly to create a whirlpool effect. This helps incorporate air into the milk for a silky texture.
- Steam the Milk: Turn on the steam wand and let the milk froth. Listen for a gentle hissing sound as the air is incorporated. As the milk froths, you’ll see it expand and increase in volume.
- Create Microfoam: Once the milk has doubled in size and reached a temperature of around 150°F (65°C), submerge the steam wand deeper into the milk to stop adding air. This creates a smooth, velvety texture. Avoid overheating the milk, as it will lose its sweetness and texture.
- Swirl the Milk: After steaming, swirl the milk in the pitcher to integrate the foam and smooth out any larger bubbles.
3.3 Step 3: Pour the Cappuccino
Now that you have your espresso and steamed milk ready, it’s time to assemble the cappuccino.
- Pour the Espresso: Pour the brewed espresso into a pre-warmed cappuccino cup (usually around 5 to 6 ounces).
- Add the Steamed Milk: Slowly pour the steamed milk into the cup, starting with the milk and then topping with foam. The ratio of espresso to milk should be about 1:1:1—one part espresso, one part steamed milk, and one part foam. Aim to create a thick, creamy foam layer on top.
- Finish with Foam: You should have a rich layer of frothy milk on top of your espresso. If you’re practicing latte art, this is the point where you can pour designs into your cappuccino.
3.4 Step 4: Serve and Enjoy
Your cappuccino should have a thick, foamy top with the rich flavors of the espresso and a creamy texture from the milk. Serve immediately while the foam is still fresh and creamy.
4. Tips for Perfecting Your Cappuccino
Making the perfect cappuccino takes a little practice, but with a few tips, you can improve your technique:
- Use Fresh Beans: Always use freshly ground coffee for espresso. Beans that have been sitting around for a while can result in a flat or stale taste.
- Monitor Milk Temperature: Milk that’s too hot will lose its sweetness and texture. Aim for 150°F (65°C) when steaming milk for the perfect foam.
- Don’t Over-Froth the Milk: The goal is to create smooth, velvety microfoam. Over-frothing can create large, bubbly foam that doesn’t have the same creamy texture.
- Preheat Your Cup: A warm cup helps maintain the temperature of your cappuccino. Run hot water through the cup before brewing the espresso for a better result.
5. Common Mistakes to Avoid When Making Cappuccinos
Here are a few mistakes beginners make when making cappuccinos and how to fix them:
5.1 Weak Espresso
If your cappuccino tastes weak, it could be due to under-extraction. Ensure you’re using the right grind size (fine), tamping correctly, and brewing the espresso for the right amount of time (25-30 seconds).
5.2 Milk with Large Bubbles
Large bubbles in the milk can affect the texture and mouthfeel of your cappuccino. Make sure you’re steaming the milk at the right temperature and listening for the correct sound as you froth. Aim for microfoam with a smooth, silky texture.
5.3 Too Much Milk
A cappuccino is about balance, so make sure the milk-to-espresso ratio is correct. If there’s too much milk and foam, you may end up with more of a latte than a cappuccino. Aim for a 1:1:1 ratio of espresso, milk, and foam.
6. Conclusion: Mastering the Cappuccino
Crafting the perfect cappuccino is a rewarding process that requires patience, precision, and practice. By focusing on each component—the espresso, the milk, and the foam—you can create a cappuccino that’s rich, creamy, and full of flavor. With time and attention to detail, you’ll be able to brew a cappuccino that rivals your favorite café.
Whether you’re just starting or have been brewing coffee for a while, mastering the cappuccino is a step toward becoming a true barista. Keep practicing, and soon, you’ll be able to impress anyone with your perfectly balanced cappuccinos.

I’m an economist with 15 years of experience in strategic planning and a lifelong passion for wellness and natural living. As a self-learner, I created Herbalife Balance to share insights on healthy eating, mindful habits, and an active lifestyle. Tennis enthusiast and nature lover, I believe in balance as a path to well-being. Through this blog, I help others live healthier, more conscious lives.